
Panning Photography

The skill of panning photography is going to take every ounce of patience you have. While the concept is simple, the execution can go wrong more times than it is successful. Almost every person I have talked to about this type of photography has told me that it wasn’t until they saw that “one cool photo” that they had that “AHA!” moment.
Indulge me while I walk you through how I found out how to do it and give you some tips to help you more easily get a handle on this than I did. I was 13 when I stumbled upon this. Yes, stumbled, sometimes ignorance is bliss, and as a 13-year-old trying to freeze images with high shutter speeds, my lack of knowledge produced an image that gave me some ideas.
Back then, we had a family dog, “Brandy.” A miniature poodle that was a bolt of white lightning when he ran out the back yard, from side to side, he darted as if he was doing sprints. One afternoon I was trying to freeze the motion for a photography class, but my novice brain did not adjust the shutter speed, and as such, it was not fast enough to achieve what I wanted. After a roll of film, a tired dog that was fed up with my milk bone bribery, I discovered in the darkroom that I could freeze part of the dog yet have the background blurred. (Insert my AHA! moment here).
It wasn’t like I got “the” shot, out of the 20+ images, only one even got close to what I would have considered worthy of submission to my teacher. I remember being inspired and heading out to buy a bag full of film and more milk bone dog biscuits than should ever be fed to a dog. It was for a school project, and Brandy would have to take one for the team.
So, this latchkey kid would have a couple of hours each day to work on getting this image. Dozens of film rolls, and a few extra pounds on Brandy later, I got the shot! A dog, head and body in focus, legs a little blurred, mid-stride, hovering over the ground, with a green background in a full-fledge motion blur… “AHA!”
At the age of 13, I felt I had achieved photographic NIRVANA; I had the “Holy Grail” of photographs that would put me on top of the class. I felt great until my mother found the evidence of milk bone boxes and noticed Brandy had put on weight. She approached me, and I admitted what I did. I was banned from feeding the dog snacks. My punishment was walking the dog until he shed the weight.
Fast forward 30 years, RIP to Brandy, who died of a heart condition… probably from eating too much fatty milk bone treats, and here I am writing this article.

Here are a few tips I put together to hopefully take your keepers from one out of five-hundred to one out of one-hundred. Like a lot of photography, panning is a percentage game; one keeper out of one-hundred photos is not out of the ordinary. But, I promise that “one” is worth the effort!
Understand the basic concept
Panning works when you move the camera in perfect synergy with the subject. It’s not enough to just swing the camera from side to side. You have to move it in perfect synch with your subject. Sounds easy, right? “HA, I say…”

Choose the right subject
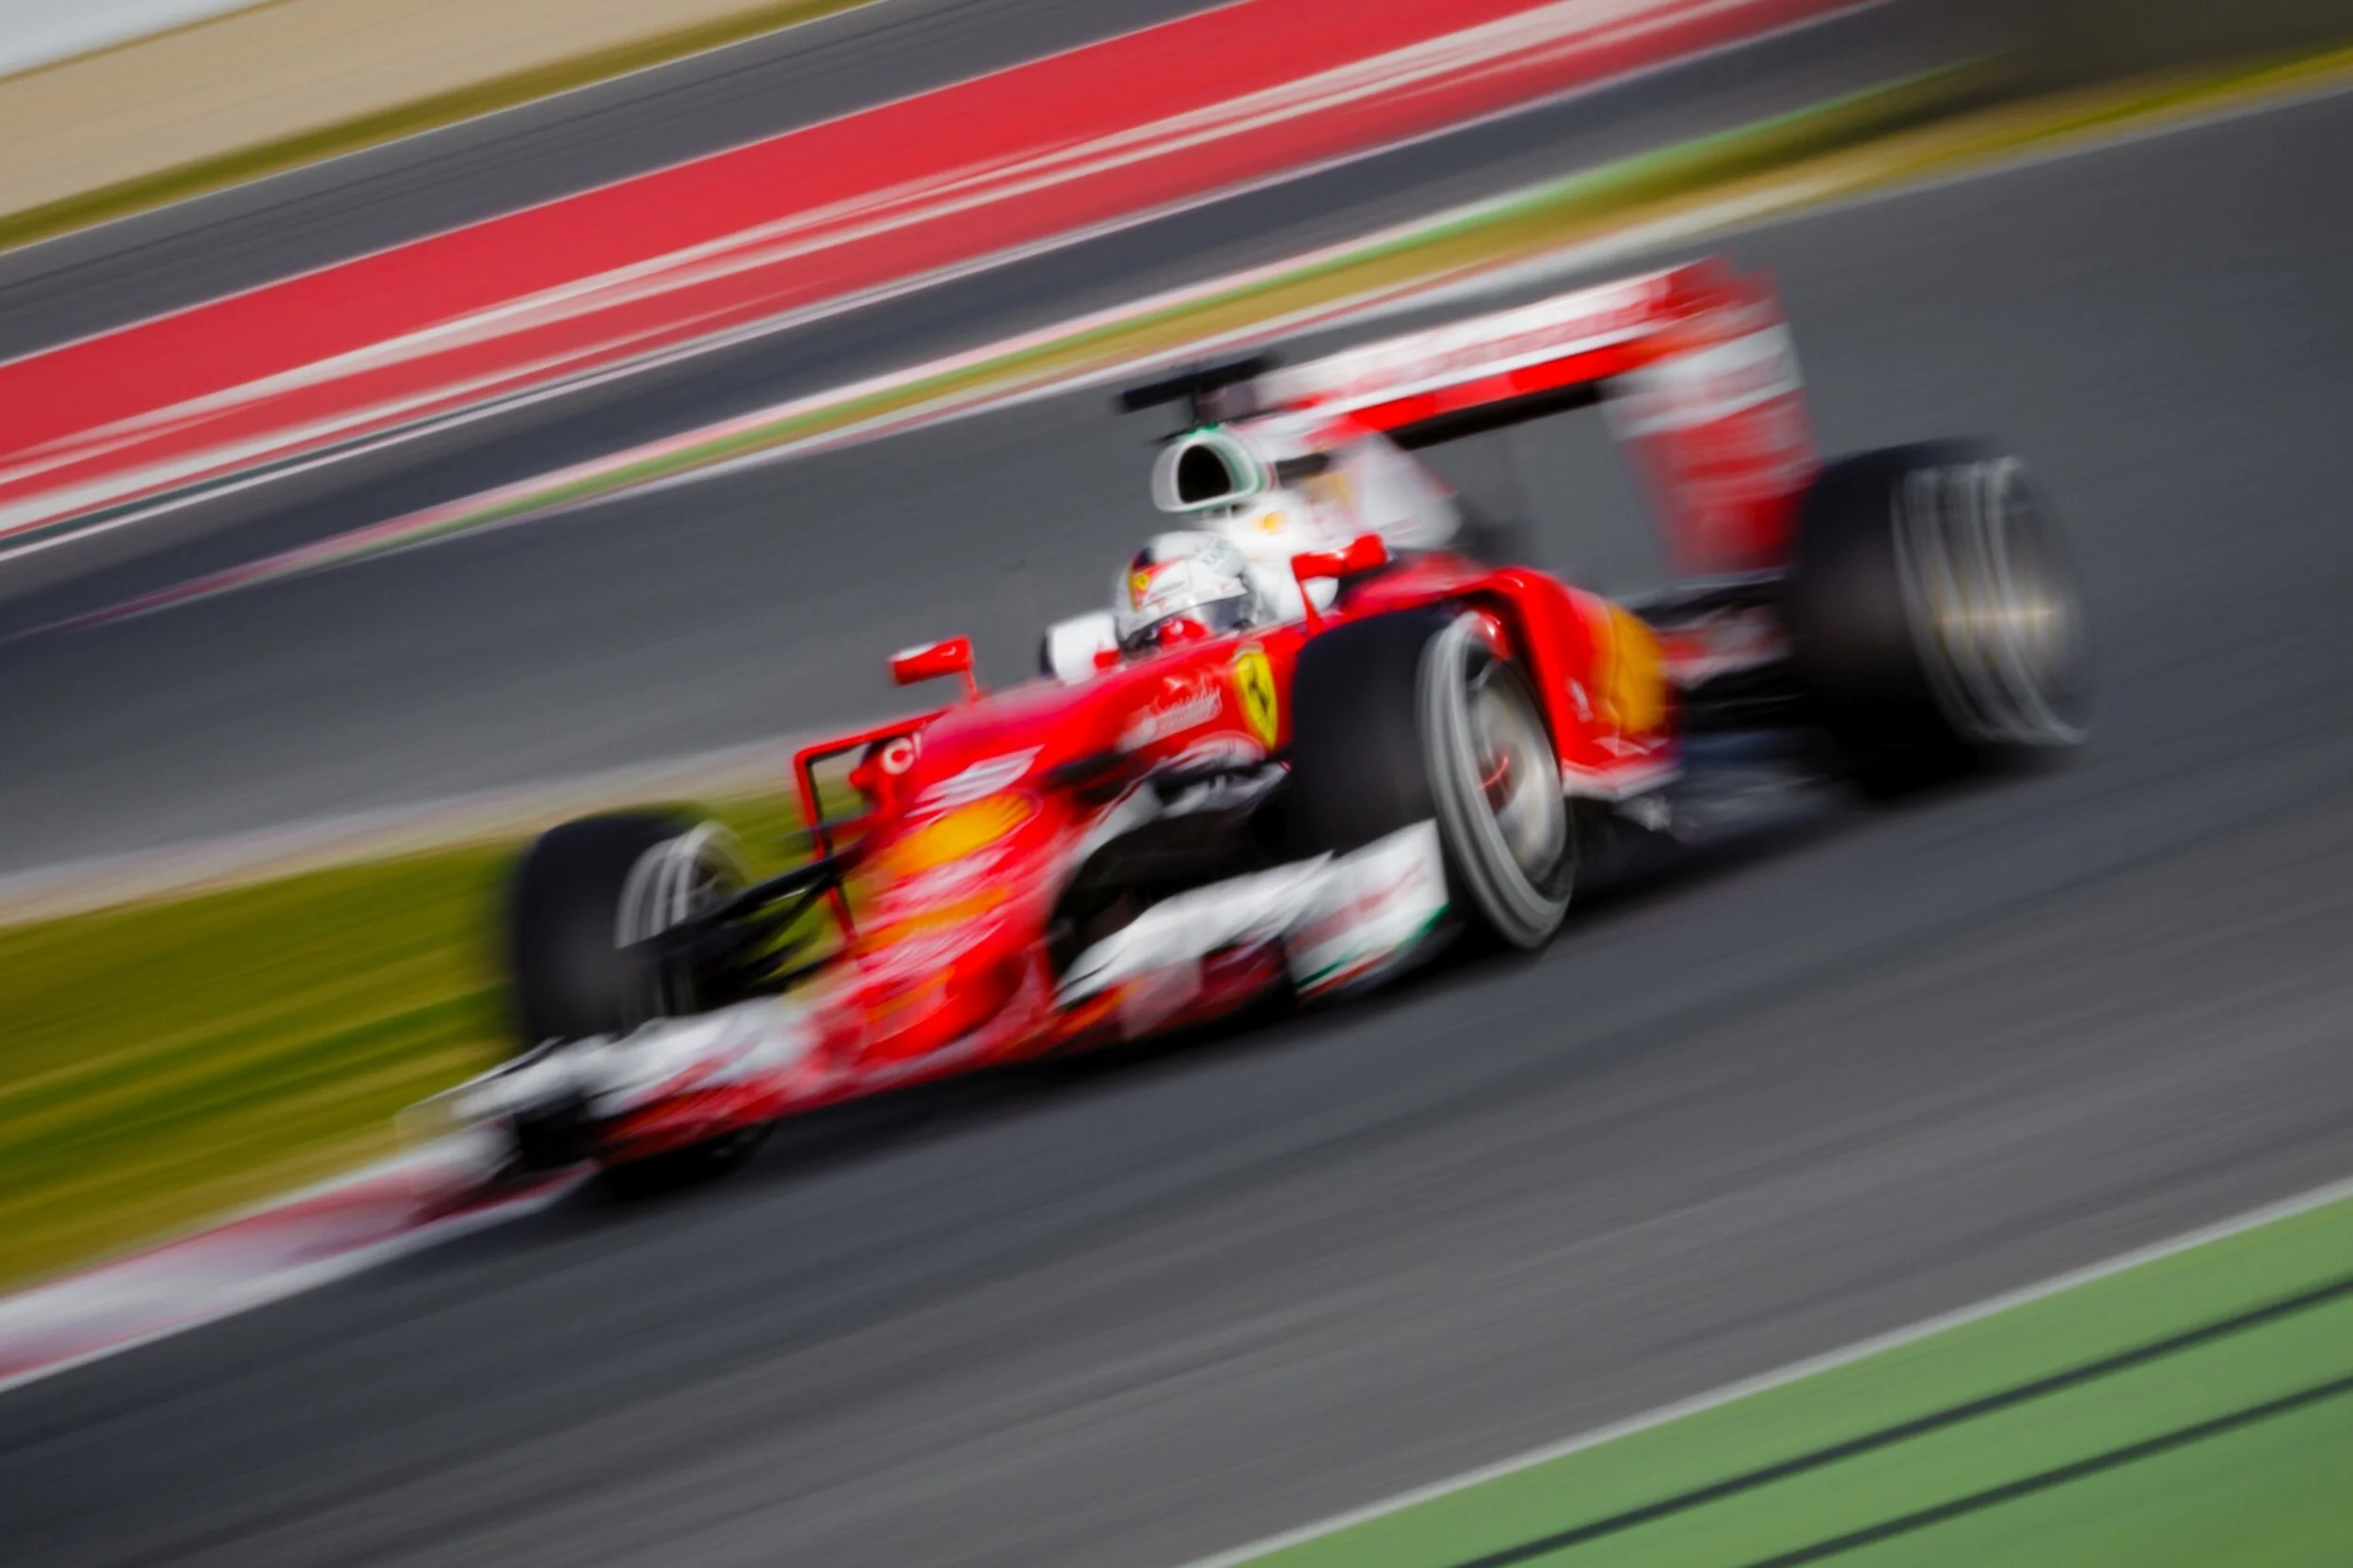
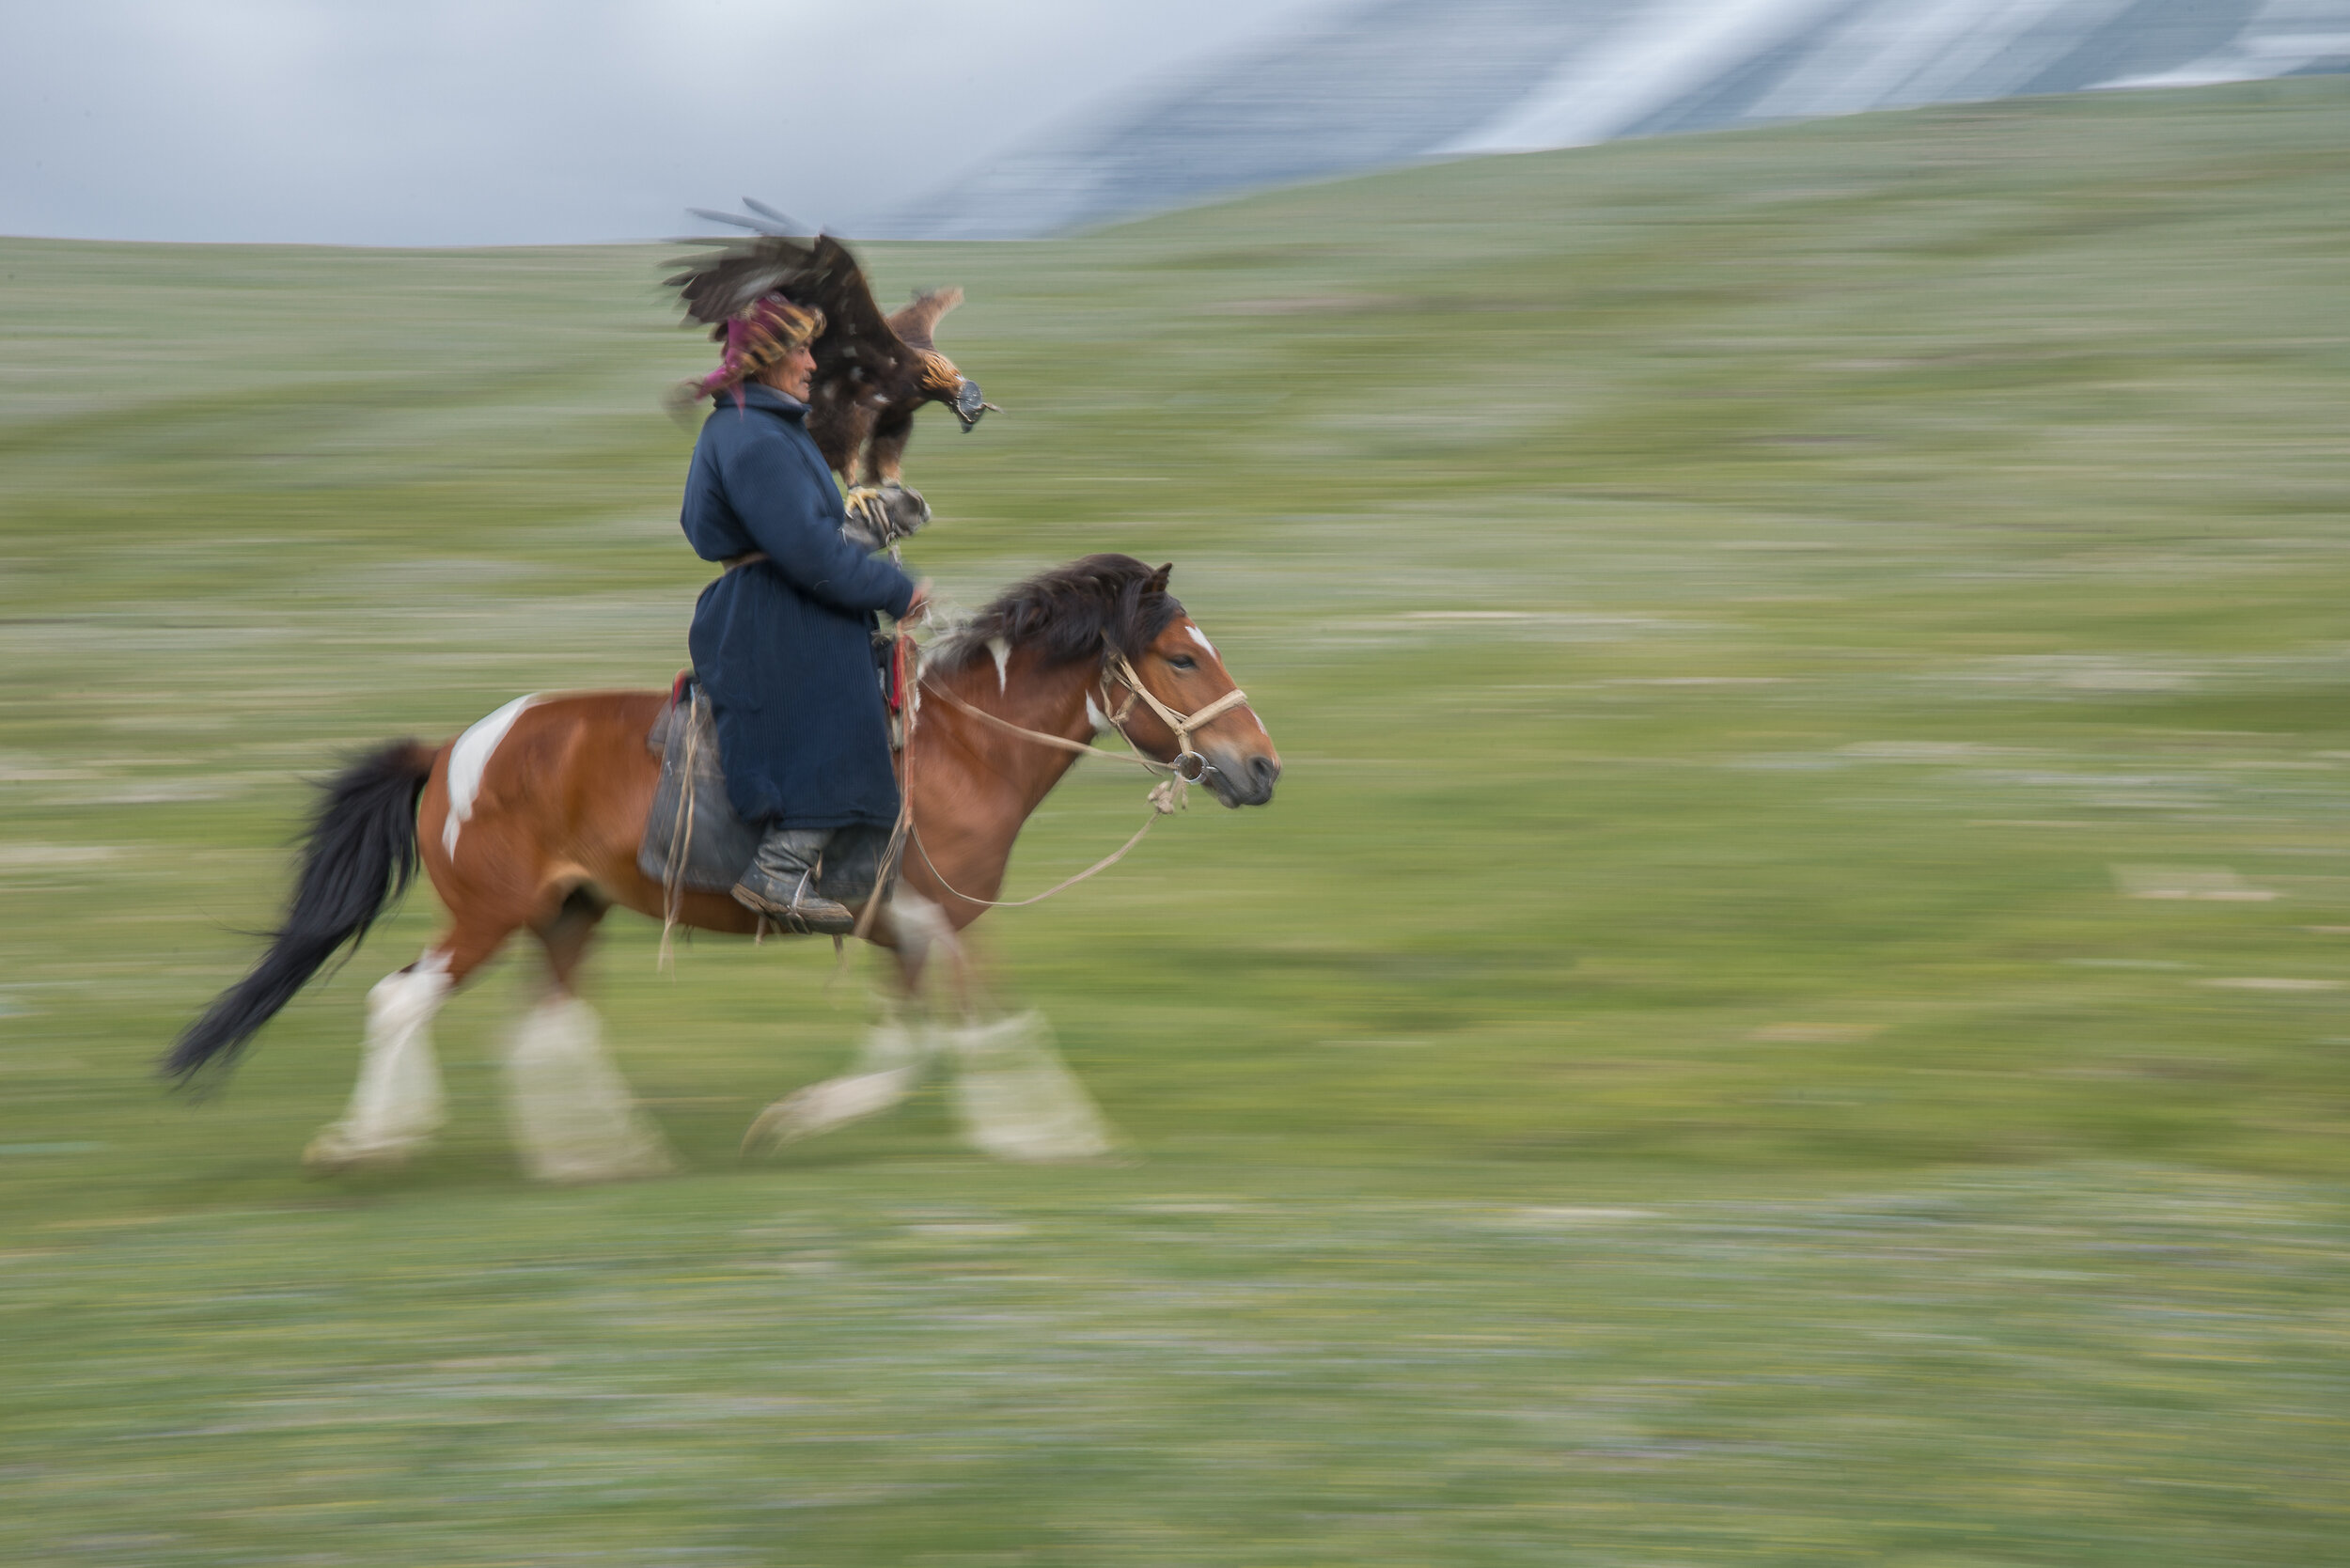
Generally, it is easier to pan with a fast-moving subject than a slow one. Sprinters running sideways to you are great examples. They are moving fast enough that you can pan smoothly with their straight-line motion. People walking or casually jogging are almost impossible; they are too erratic and slow to get much blur, and it’s difficult to pan smoothly. Football players are tough because they move erratically. And running dogs like Brandy, well, give them something to run for, and they will do it because they want to please.

Use Manual Exposure or maybe Shutter Priority
Whichever you choose, the object is the same. You don’t want the shutter speed to change while you are shooting.
Focus Tracking
Your subject must be in focus. You might like to switch focus to AI Servo mode (in Canons) or AF-C mode (in Nikons). In this mode, hold down your shutter halfway to lock focus on your subject. Without letting go of the shutter, start following your subject with your camera at the same speed. Your camera would automatically adjust focus. You can take several shots at once; the number of photos is dependent on your camera. For you birders, it’s the same principle, keep the focus on what you want to be in focus.

Find the Right Background
The right background is almost as important as the right subject. The background must have some detail to produce the pleasing streaks you will want. That is why the jet is a bad subject for panning when it is up against a plain blue sky. Pan all you want, but the sky is a solid color, blue. Nothing will look as if it “moved.” On the other hand, backgrounds with too much contrast will often make bad backgrounds for panning. Just one person in a white T-shirt can create an unsightly white blob in your photograph. So choose carefully, play with different scenes, and find one that works.
Pick a good shutter speed
This is important; however, there is no “correct” shutter speed for panning. The longer the shutter speed, the more blurred the background will be, and the higher the probability your image you wanted in focus will blur. A long shutter speed will make your subject pop out from the background, and that is good. It becomes a balancing act. As a starting point, let’s go back to the example of the sprinters running across the picture. Try anything between 1/8 of a second and 1/60 of a second. Beyond 1/8 of a second, it’s really tough to get sharp. Above 1/60 of a second, the camera will probably stop too much action and ruin the effect. Except for faster moving objects like flying birds or jets. Then you might need 1/250 of a second for a bird and 1/500 of a second for the jet, and that brings us to our next problem.
Practice panning smoothly
A Fluid, smooth motion is the name of the game. No jerking, no rushing, and done without hesitation. The stance should have you face the subject that you want to focus on, or sit on the ground to stop you from moving too much. You then rotate your shoulders to pick up your subject in the viewfinder. Start clicking the shutter before your subjects reach the ideal point and then keep shooting after they pass that point. Good follow-through is imperative. The best panning shooters go out and practice their movements.
Try. Evaluate. Retry. Experiment!
There is no right or wrong way to produce the desired results… set rules do not apply. But try it, have fun with it, experiment with camera motion.
A couple of final words on “Panning Photography.”
Things do not always have to be totally in focus. This type of photography, in addition to showing the motion of an object, can be an artistic type of photography. Technically, you should not be able to have motion in a still photograph. This is a two-dimensional form of art. But the act of panning will force a person to look at the image more closely, and they will until they come to realize: “That’s not a blurry picture; that’s a young boy taking a photo of the dog he loves running in the backyard. That’s cute!”
Now go out, try this, and “pay it forward” so the next person can have their AHA! moment.
Happy Shooting!
~Kevin