
Backyard Bird Photography - Feeder Setup, Photography Gear, Feeding Options
Let’s first discuss the location that you should consider for setting up your backyard perches somewhere on your property.
Some locations in your yard may be better than others for attracting birds. A bird feeder in the middle of open ground can put small birds at risk from predators. Setting the feeder too close to the ground or a fence provides easy access for cats or squirrels to invade your feeder. I like to set my feeder up in the corner of my yard so the tall evergreen trees protect it.
Think about the light when picking a spot. When will you be going out to photograph birds? You will want the sun to be at your back so that you can maximize the best light possible.
There is one location in my yard that gives me good light late in the day. The sun will be over my right shoulder early in the evening, then it sets over my left shoulder.
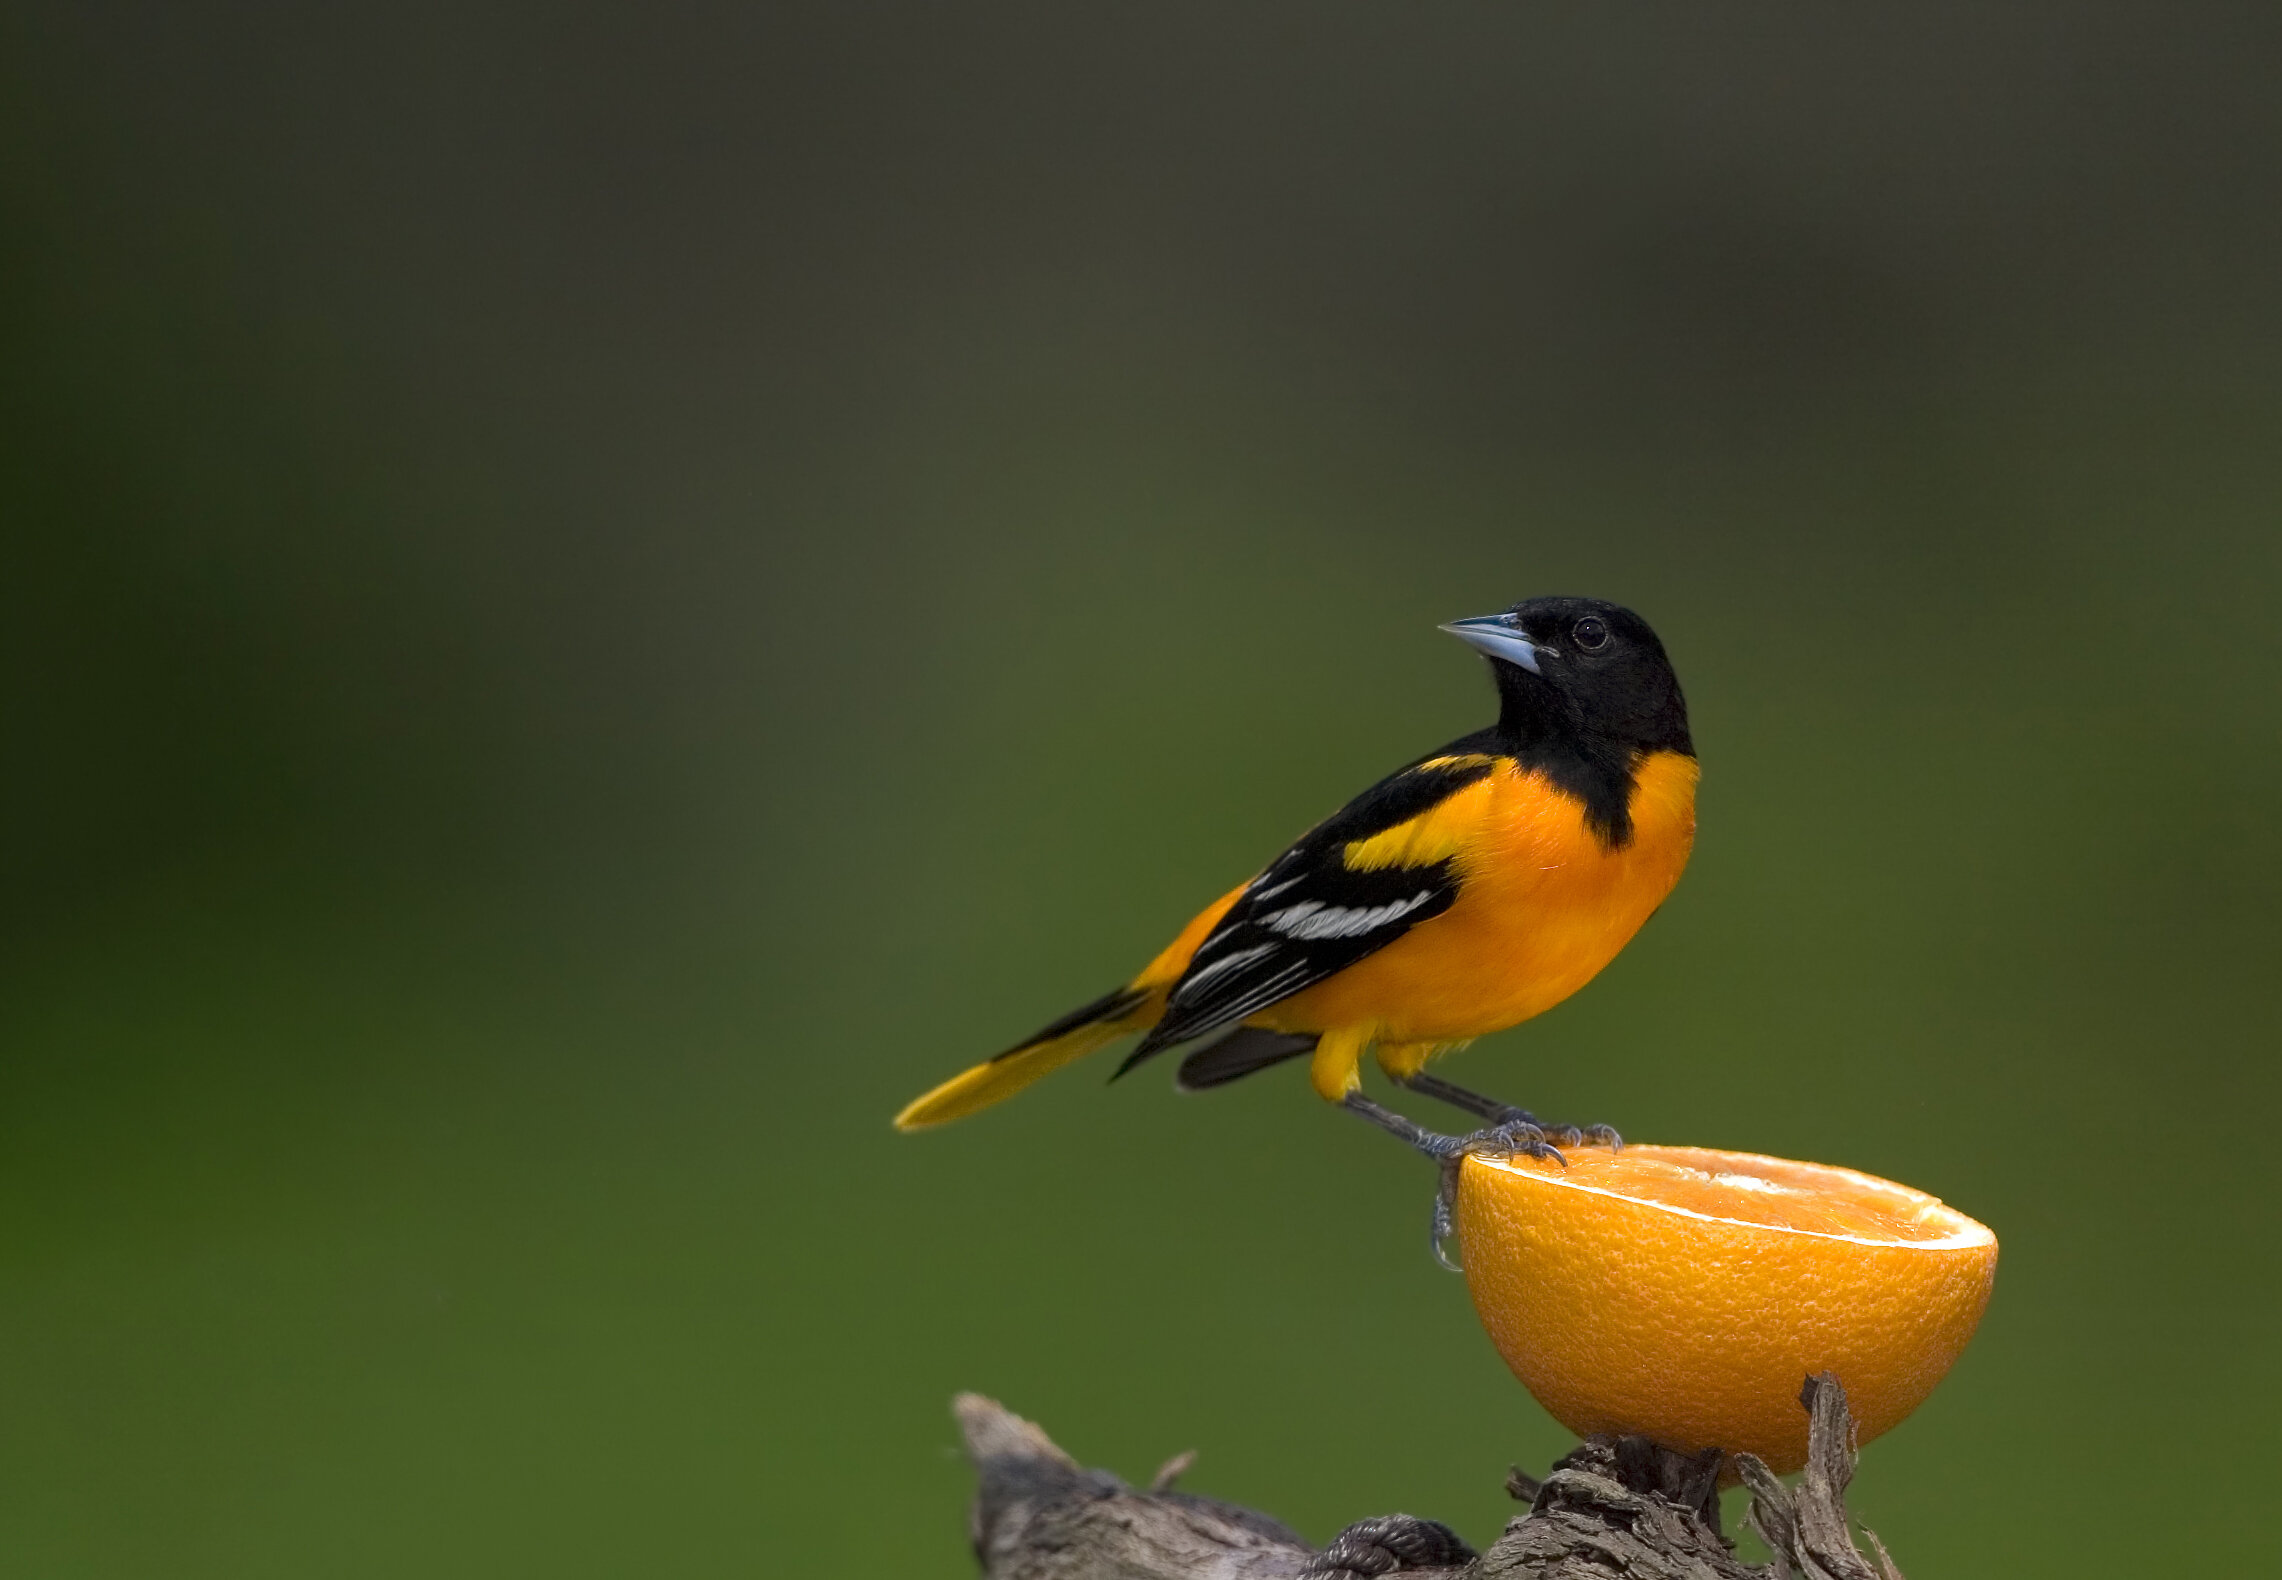
Place the feeder near convenient natural perches that the birds will land upon and pose for you. Iron brackets, man-made poles used to set up your feeder can detract from that natural look. I will go as far as to attach cut branches for the best perch enhancement. Hide the man-made structures to give it a more natural look. I will then change these branches often so all my photos do not always look the same.

The Physical Set up of Your Backyard Bird Feeder
Remember, the purpose of the Birdfeeder is for attracting the birds, your images will all be taken on the perches where birds who are waiting for their chance at the feeder can wait. It will be these birds, on these purposefully pretty perches, that you'll want to photograph.
Use plants native to your region to help lure birds to your yard. Whether you live in the city, or out in the county, the flora and fauna growing around your home will dictate the diversity of birds that visit.
Consider your background when setting up your backyard feeder. You want to set your feeder up in front of an environment that is not distracting. You want to present a natural setting. Avoid straight lines like branches or other man-made objects like poles or wires.
In my set up, my background is cedar bushes that offer a smooth environment that will blur nicely in my photos. To further enhance the smooth background, I will photograph my birds using a shallow depth of field.
You should also keep in mind the distance between the camera, subject, and background. The closer you are to the feeder, the thinner the depth of field will be at any given aperture. The further your feeder is away from the background the more blur you are going to be able to get at any given aperture.
If you want a background to appear blurrier, try moving your feeder further away from it. This will allow you to use the camera settings you already have dialed-in while changing what will be in focus in your photograph.
My setup is such that I will be set up 50 yards away from the feeder. The background will be 20 yards in front of the cedar trees. My camera will be set up with the appropriate aperture that will blur the background.
Example of a clean and attractive background
Example of a cluttered background

Choose A Healthy Food Source For The Birds In Your Backyard
Spring feeding suggestions
You can place out natural food like fruit, baked and crushed eggshells.
If you live in an area like me that gets high traffic of Warblers in the late spring. Here are some good suggestions for these small birds.
Offering suet is a great way to attract warblers. Suet is a great substitute for the insects they like to eat. Smear suet in the bark of a tree, offer suet cakes in wire cages or other specially designed suet feeders. If you live in a rural area like me, you might be able to purchase ready-to-use suet cakes available in a variety of flavors for home delivery.
Water is one of the best attractions for all warblers. A birdbath, pool-like depression, or an elaborate running water system works great. The sound of water dripping is often more attractive to warblers than a birdbath.
Some warblers will also visit your backyard feeding stations to eat black oil sunflower seed.
Summer feeding suggestions
Limit to nectar for hummingbirds and nyjer seed for goldfinches. For larger bird species you can consider things like Suet cakes: commercially made suet cakes fit the standard-size suet feeder (you can even find vegetarian options).
Autumn feeding
Offer millet, peanuts, peanut butter, and suet cakes
Winter suggestions
Black-oil sunflower seed: high in fat so it provides good energy; seeds are small and thin-shelled enough for small birds to crack open.
White Proso Millet: high in protein content.
Peanuts: offer in tube-shaped metal mesh feeders designed for peanuts; use a feeder with smaller openings for peanut hearts.
Suet cakes: commercially made suet cakes fit the standard-size suet feeder (you can even find vegetarian options).
Nyjer seed: use a tube feeder with tiny holes to keep the seeds from spilling out.
Cracked corn: choose medium-sized cracked corn, as fine will quickly turn to mush and coarse is too large for small-beaked birds.
Are any human foods UNSAFE to feed birds? Yes. Birds should not be offered many of the foods humans eat. Bread (fresh or stale): provides no real nutritional value for birds; moldy bread can harm birds. Chocolate: toxic to birds, just as it is to dogs and cats (it contains theobromine); never offer birds any foods containing chocolate.
Table scraps: some may not be safe or healthy for birds and most table scraps will attract mice or rats.
Check out some of the bird feed options on Amazon. Visit this link: Bird Seed on Amazon

Setting up and Positioning yourself
There are a few things you can do here that will help you create a place that birds feel comfortable to visit without knowing you’re there.
You can get a hide (a camouflage tent or drape). I use this one. Click Here
Hide behind a structure (I hide behind the corner of my house or behind a bushy tree from my front porch)
Shoot from inside your house – You can shoot from whatever room you like, as long as it gives you a clear line of sight. Just make sure you clean the glass or have a window that can open.
If you do not have a blind it is best to wear beige or green clothing. Nothing too bright to draw attention to yourself.
The gear that I will use for my backyard bird set up will be the following:
Camera - Nikon Z9 Full-Frame Mirrorless Camera
Lens - Nikon 500PF f5.6 lens
A remote shutter release can be used so you can set up my camera and lens to photograph the birds as they fly down onto the limb or feeder. It reduces your movement.
A sturdy Tripod
If you have one, a gimbal head to maximize the fluid range of motion to get more keepers. My favorite gimbal is the Jobu gimbal. See that gimbal here
Then there is an external flash to light your bird if the lighting is not optimal.
The vast majority of my bird photography is done with natural light. But there are times when some extra help is needed with illumination in the form of electronic flash. An electronic flash is a burst of artificial light used to illuminate a dark photographic subject. I am not talking about the built-in pop-up flash on the camera, I am referring to a dedicated flash unit is a much better option for wildlife.
When are some situations when flash could be used to improve the light? You might have a backlit bird on a perch - the sun is behind your wildlife subject - but instead of letting details in the animal go black to create a silhouette, you want to keep some details. A burst of flash can reveal details in your subject's darkened areas without changing the exposure anywhere else in your image. In other words, it helps balance out the light in the scene.
The main reason to use a flash to improve the lighting is the “catch light in the eye” – think, gleam in the eye, something I think is very important in my backyard bird portraits. Using a flash can create an easy and natural-looking catchlight.
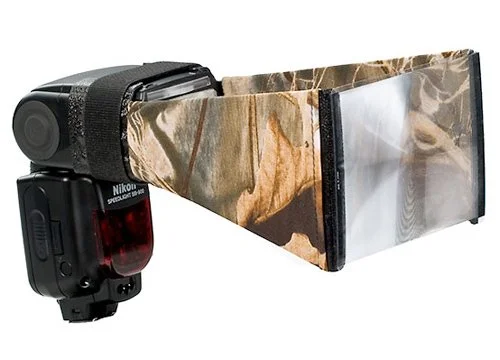
Flash Extender
A dedicated flash unit sits on top of your camera and connects via the hot shoe. Depending on the specific model - each camera manufacturer offers a few different options and features - it's more powerful than any pop-up flash. It provides more options for the wildlife photographer. You can also take the flash unit "off-camera" with a dedicated TTL sync extension cord for a slightly different light angle. The flash unit and camera should be of the same manufacturer for the most consistent results.
Electronic flash has limited reach in terms of distance, presenting a problem when using a telephoto lens. This is when a flash extender could be used. An extender fits onto the front of the flash unit, concentrating the power of the flash with a Fresnel lens, which extends its effective distance. If you plan on using electronic flash for wildlife photography, a flash extender is an essential item. Some good options are the Magbeam Wildlife Kit by Magmod and the Better Beamer by Visual Echos.
When using a large, super-telephoto lens, such as a 500mm or 600mm model, you should also consider using a flash bracket to mount the flash a few inches above the lens. It raises the light source just enough to prevent red eye in your wildlife subjects and provide more depth to the image. You will need an extension cord to connect your flash unit to the camera when using a flash bracket and a TTL - through the lens - sync extension cord for a flash unit.
Lens Suggestions For backyard Bird Photography
Canon Lenses
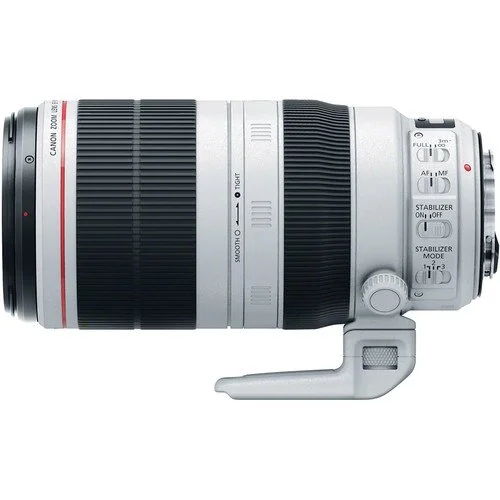
EF 100-400mm f/4.5-5.6L IS II USM – The EF 100-400mm f/4.5-5.6L IS II USM lens delivers a superb combination of cutting-edge performance, compact construction and brilliant resolving power that’s great for sports and wildlife photography.

RF100-500mm F4.5-7.1 L IS USM – The RF 100-500mm F4.5-7.1 L IS USM super-telephoto zoom lens delivers a superb combination of cutting-edge performance, compact construction and brilliant resolving power specifically designed for the EOS R system. The versatile range of 100mm to 500mm is ideal for sports, wildlife, and even aviation photography while maintaining a compact, travel-ready size and weight.
Nikon Lenses

200-500mm f/5.6E ED VR (DSLR mount) – Wherever your passion lies, this outstanding super-telephoto zoom lens can bring it into focus. Capture and share stunning views of birds, wildlife, motorsports, athletes, performers, landmarks, and other faraway subjects. A fast f/5.6 constant aperture gives your shots beautifully out-of-focus backgrounds across the entire zoom range.
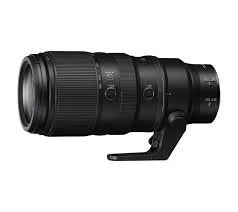
Z 100-400mm f/4.5-5.6 VR S (Mirrorless Mount) – The NIKKOR Z 100-400mm f/4.5-5.6 VR S brings a super telephoto zoom range that's ideal for wildlife, sports and action together with premium S-Line optics, breathtaking image quality, effortless autofocus, rock-steady VR and comfortable handling—all in a travel-friendly package that brings so many shots within reach.
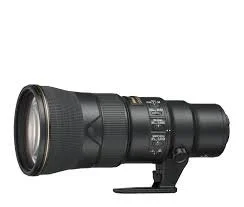
AF-S 500MM F5.6 E PF ED VR (DSLR Mount) – When photographing birds, wildlife, sports or action, mobility can make the difference between nailing the shot or missing it altogether. The AF-S NIKKOR 500mm f/5.6E PF ED VR is a fraction of the size of most full-frame 500mm lenses, freeing you to be as nimble as your subjects.
Sony Lenses
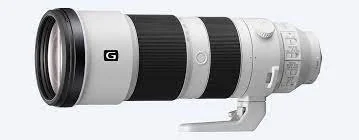
200-600MM F5.6-6.3 OSS G LENS (Mirrorless Mount) – Perfect for wildlife and more, this 200–600mm super-telephoto zoom can reach as far as 840mm or 1200mm with 1.4x and 2.0x teleconverters, with full G lens quality and AF performance. Aspherical and ED glass elements achieve superb resolution throughout the zoom range, while Sony's Nano AR Coating cuts flare and ghosting. The bokeh is gorgeous, too.
Tamron Lenses
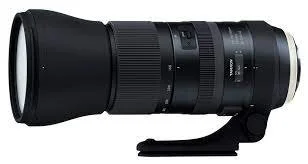
150-600mm F/5-6.3 Di VC USD G2 SP (DSLR Mount) – The SP 150-600mm G2 ultra-telephoto lens with upgraded optical performance enables handheld shooting with remarkable definition. This new lens builds upon the success of the current SP 150-600mm (Model A011) which Tamron first introduced in December 2013, including better overall optical performance and faster AF speed
Shop in the USA - make sure you order the correct mount for your camera
Shop in Canada - make sure you order the correct mount for your camera
Sigma Lenses
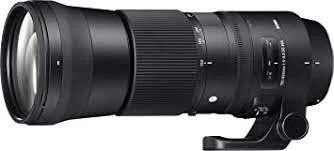
Sigma 150-600mm f/5-6.3 DG OS HSM (DSLR Mount) – Balancing the optical design, this lens also features a Hyper Sonic Motor, which provides especially fast and quiet autofocus performance as well as full-time manual focus override. An Optical Stabilizer also works to minimize the appearance of camera shake for sharper handheld shooting. Additionally, a removable, rotating tripod collar is included to suit working atop a tripod or monopod.
Shop in the USA - make sure you order the correct mount for your camera
Shop in Canada - make sure you order the correct mount for your camera

Here are some guidelines for your camera settings:
Focus: If the bird is stationary, focus on the eyes. If the eyes are not sharp, then you’ve probably missed the shot.
Camera Mode: To keep it simple I favor Aperture Priority for most cases. It will give you the freedom to quickly adjust your depth of field.
Shooting Mode: Place your camera on burst mode to increase the number of frames per second your camera will be taking.
Focus Mode: You will want to place your camera on continual focus so you can track the bird by pushing your shutter button halfway down to maintain focus. Pressing the shutter the whole way down till taking the photo. For those of you that use back button focus, you’ve got this because this is second nature to you. ;-)
Aperture: Go for a shallow depth of field. Remember, you want to separate your subject from the background. If your lens is high quality, you should be able to shoot wide open without a substantial loss in sharpness. (Lower quality lenses may need to be stopped down a bit to achieve a sharp image). Use a long lens in the 300-600 range set to an aperture of f2.8, f4, or even f5.6 in the long-range. It will create good separation between your subject and the background.
Shutter Speed: choose a shutter speed that is fast enough to attain a sharp image. If you lose sharpness due to motion blur or shake, you’ll have missed the shot. A good rule is that when hand-holding a lens is to photograph backyard birds with a shutter speed of 1/2000th of a second to ensure sharp images. My birds in flight images are generally around 1/3200th of a second, and if I want to try and get a little motion blur in the wings I will go as low as 1/400th of a second.
ISO: Depends on lighting, but choose an ISO as low as you can without lengthening your shutter speed or introducing unwanted noise.
Good luck with capturing photos of the birds in your backyard.
Don’t forget to head back to my resource guide to see more in-depth tips on wildlife photography